Check each bubble carefully to understand why it formed.
Gently push out air with a soft squeegee or microfiber cloth.
Use controlled heat to relax the film and make smoothing easier.
When I work with car film, every bubble tells me what went wrong—whether it’s the film type, the tools, or the technique. In this post, I share how I spot the causes of car film bubbles, the tools I rely on, and the methods I use for both light surface bubbles and deep, stubborn ones. I’ll show you how heat helps me smooth the film, when I re-lift and re-apply, and how I prevent bubbles from forming in the first place.

Why Car Film Bubbles Form and How I Identify the Cause
When I inspect a car wrap with bubbles, I don’t rush into fixing them. I take a moment to understand why they appeared, because the cause always guides the solution. Most bubbles come from trapped air, contamination, improper tension, or low-quality car film. Sometimes the substrate isn’t prepped correctly, and oils, wax, or dust interfere with adhesion. Other times, heat was used too early or too aggressively, which makes the film shrink unevenly and trap air beneath the surface. By checking the bubble size, shape, and location, I can tell if the issue started during installation or if it developed later due to temperature changes or film movement. When I understand the cause, I always choose the safest and cleanest removal method.
The Tools I Use to Remove Bubbles from Car Film
I never approach bubble removal with guesswork. I keep a dedicated set of tools ready because every bubble responds differently. My main tools include a high-quality squeegee with a soft edge, a heat gun with adjustable temperature, a precision pin or air-release tool, and a microfiber glove for final smoothing. For deep or stubborn bubbles, I rely on an ultra-fine needle that creates a nearly invisible release point. For large areas, I prefer a felt-edge squeegee so I don’t scratch the car film. When I work with sensitive films like matte or satin, I use extra-soft materials to maintain the finish. The right tools let me fix bubbles quickly without damaging the wrap.
How I Fix Small Surface Bubbles in Car Film
For small bubble the most easiest to fix it. At first can use the heat gun to heat the car film more flexible, and then can use a soft squeegee to push the air toward the nearest edge. If the bubble sits on the air release paper, it can disappears with the gentle pressure. When the bubble very small, can just need to use the heat gun to heat it in control, and more patience to exlcude it, and the small bubble will disappear without leaving marks
My Method for Removing Deep or Stubborn Car Film Bubbles
Deep bubbles require more precision. I start by determining whether the bubble caused a crease or if it simply trapped a pocket of air. If the bubble has tension around it, I create a tiny release point using a fine pin. I always keep the puncture microscopic so the hole blends seamlessly into the car film. After creating the release channel, I gently warm the film to soften the adhesive. I can use the squeegee to push the air outwared in smooth. When the bubble near an edge or contour, need to lift a small part of the car film, use the soft squeegee to exlcude the air that we can restore the car film without leaving any mark.
How Heat Helps Me Smooth Out Car Film Bubbles
Heat is one of my most valuable tools for removing car wrap bubbles. I use it to soften the film, relax the adhesive, and eliminate tension that holds bubbles in place. Controlled heat allows me to reshape the film, especially on curved surfaces and complex panels. I keep the heat gun moving so I don’t overheat one spot, because too much heat causes gloss distortion or adhesive failure. When used correctly, heat helps the car film settle naturally into place and makes bubble removal safer and smoother. It also helps me restore the film after creating a micro-puncture because the adhesive reflows and seals the area.

When I Choose to Re-Lift and Re-Apply Car Film
Some bubbles don’t respond to punctures or heat because the problem lies deeper. In those cases, I choose to re-lift the car film. I warm the area gently and lift the car film past the bubble to release the trapped air or contamination. Once lifted, I inspect the surface for dust, moisture, or grease. If I find contamination, I clean the panel and reposition the film with the correct tension. Re-lifting takes more time, but it prevents long-term adhesive issues and ensures a flawless finish. I only choose this method when the bubble is large, when contamination is obvious, or when the wrap sits on a complex curve.
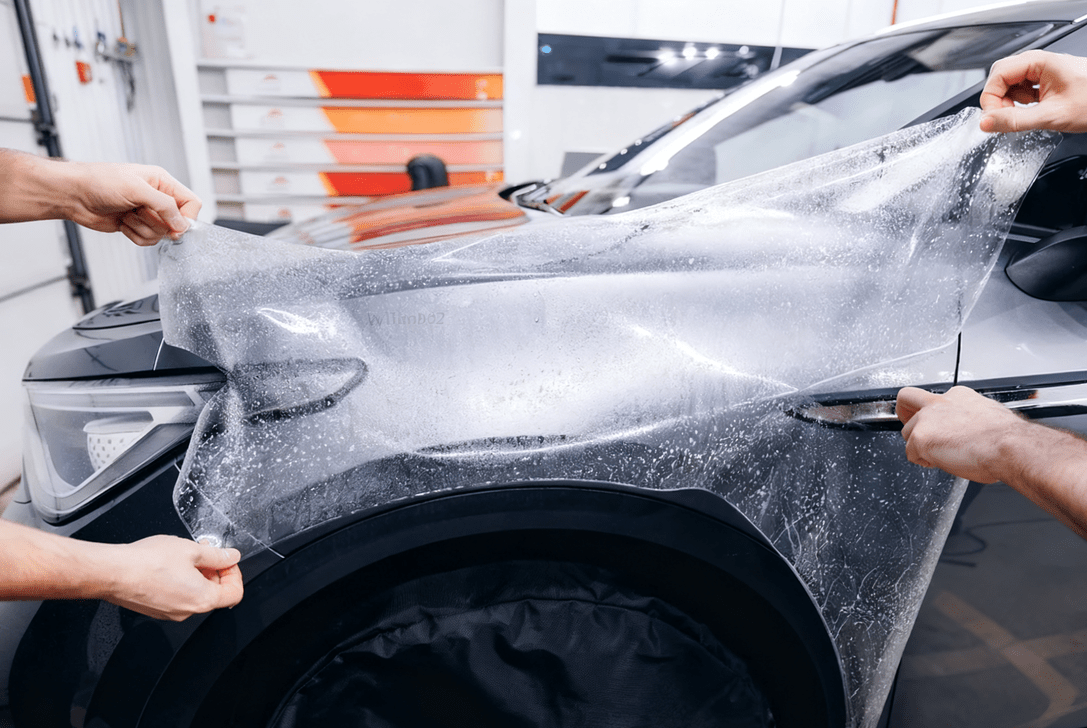
How I Prevent Car Film Bubbles During Installation
Removing the bubble is very important, but preventing the bubble is same. Before we install any car film, always need to chean the car totally first, when you apply the film with consistent tension so air doesn’t get trapped. And we can squeegee in overlappibg strokes, work from the center outward, and don't stretching the car film near edges. If you can follow those steps, you can reduce more bubble Prevention saves time, improves finish quality, and increases wrap longevity.
Common Mistakes That Create Car Film Bubbles
Over time, I’ve noticed that most bubbles come from a few common mistakes. Rushing the prep stage is the biggest one—dust or tiny debris almost always create bubble clusters. Stretching the film too aggressively leads to tension bubbles that appear hours after installation. Using too much heat early on causes the film to shrink back and trap air pockets. Incorrect squeegee angles leave gaps where air remains unpressed. Even the environment plays a role; installing in a cold or humid space affects adhesion. By avoiding these mistakes, I keep the car film smooth from the start.
How I Handle Car Film Bubbles After Installation
Bubbles that appear after installation require a different approach.
The temperature changes or adhesive settling can casuehe bubbles. If you find a bubble that you can check the bubble is expanding, shrinking or staying consistent, if the the bubble stay on the air channel release paper, you can use the soft squeegee to reomves it. For larger bubbles, I use the micro-puncture method combined with controlled heat. When the bubble forms on an edge or seam, I check for lifting, because early lifting needs immediate attention to prevent peeling. I handle these bubbles promptly so the wrap maintains perfect visual quality.

The Car Film Types That Reduce Bubble Formation
Through experience, I’ve learned that not all car films behave the same. High-quality cast films with advanced air-release technology give me the smoothest installation and the least bubbling. These films allow air to escape through tiny channels, so most bubbles disappear with light pressure. For the premium car film also can heat better, and can shape them around complex surface with bubble, For the cheaper car film will cause more bubble because the car film are thicker, stiffer and not easy to exclude the bubble. Choosing the right car film, bubble can remove more faster and the final finish looks significantly better.
When we need to remove the car film bubbles, need to know how cause the bubbles and correct the problem without damaging the wrap. When you identifying the cause, use the heat gun to heat and relift the car film to remove the bubbles. When you follow those methods that you will handle bubbles with confidence.
Why do bubbles form under car wrap film?
Bubbles usually form because of trapped air, dust contamination, uneven tension, or incorrect use of heat. When the surface isn’t cleaned properly or the film is stretched too aggressively, air pockets develop and eventually turn into visible bubbles.
Can I fix car wrap bubbles without damaging the film?
Yes. When you use the right tools—such as a fine pin, a soft squeegee, and controlled heat—you can remove bubbles cleanly. The key is to avoid forcing the film or overheating it. Gentle, precise corrections protect the surface.
Should I pop car wrap bubbles with a needle?
I only use a needle for deep or stubborn bubbles that won’t smooth out on their own. A micro-puncture gives the air a release point, and with light heat, the film reseals. I never use a large pin or poke the film aggressively.
How do I remove small surface bubbles?
Small bubbles usually respond to gentle pressure or mild heat. I warm the area lightly, then glide a soft squeegee or microfiber glove toward the nearest air-release channel. Most small bubbles disappear without puncturing the film.
What should I do if bubbles appear after installation?
First, check whether the bubble is growing or stable. For small post-installation bubbles, a warm glide often solves the problem. For larger bubbles, a micro-puncture and controlled heat usually work. If the bubble sits near an edge, check for early lifting.