Understanding the Basics: Materials and Tools Required for Car Wrapping
Car wrapping has gained popularity as a cost-effective and creative way to transform the appearance of vehicles. Whether you want to change the color, add a unique design, or protect your car's original paintwork, having a good grasp of the materials and tools necessary for car wrapping is essential. This understanding will help you make informed decisions and achieve professional-looking results.
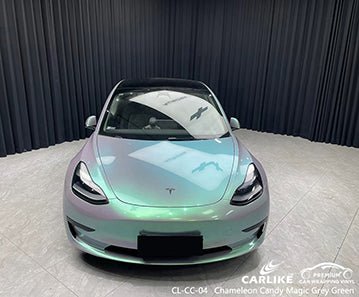
1. Vinyl Wraps: Vinyl wraps are the primary material used for car wrapping. They come in various finishes, such as gloss, matte, satin, and textured. High-quality vinyl wraps are durable, weather-resistant, and offer protection against UV rays and minor scratches. When selecting vinyl wraps, consider their quality, color options, and compatibility with your car's surface.
2. Cleaning and Preparation Products: Before applying a vinyl wrap, proper cleaning and surface preparation are crucial for optimal adhesion. Cleaning products, such as automotive soaps and degreasers, help remove dirt, grease, and contaminants. Additionally, you may need surface preparation solutions like isopropyl alcohol or primer to ensure a clean, smooth surface for the vinyl wrap.

3. Application Tools: Several tools are essential for a successful car wrapping project. These include:
- Squeegees: Used for smoothing out the vinyl, eliminating bubbles, and ensuring proper adhesion.
- Heat Gun or Torch: Apply heat to stretch and conform the vinyl around curves, contours, and recessed areas.
- Knife or Cutting Tool: Used for precision cutting, trimming excess vinyl, and creating clean edges.
- Teflon or Microfiber Gloves: Protect your hands from oils, fingerprints, and potential damage to the vinyl.
- Magnets or Clamps: Helpful for holding the vinyl in place during installation.
- Measuring Tape and Cutting Mat: Used for accurate measurements and cutting the vinyl wrap.
4. Surface Protection: To protect vulnerable areas of your car during the wrapping process, you may need additional materials. These include paint protection film (PPF) or masking tape, which can be used to cover delicate or non-wrappable surfaces like emblems, trims, and rubber seals.
5. Removing Tools: If you plan to remove a vinyl wrap in the future, having the right tools is crucial. These tools typically include adhesive removers, plastic scrapers, and microfiber cloths to ensure a clean and residue-free removal process.
When embarking on a car wrapping project, it's essential to invest in high-quality materials and tools. While there might be cheaper alternatives available, using subpar products can lead to unsatisfactory results, such as poor adhesion, premature wear and tear, or difficulty in removing the wrap.
By understanding the basics of the materials and tools required for car wrapping, you can approach your project with confidence. Remember to follow proper techniques, take your time during the application process, and seek professional guidance if needed. With practice and attention to detail, you can achieve impressive car wraps that transform the appearance of your vehicle.

Step-by-Step Guide: How to Prepare Your Car for Wrapping
Preparing your car properly before applying a vinyl wrap is crucial for achieving a smooth, long-lasting finish. The preparation process involves thorough cleaning, surface inspection, and addressing any existing issues that may affect the adhesion of the vinyl. By following this step-by-step guide, you'll ensure a solid foundation for your car wrapping project.
1. Gather the Necessary Supplies: Before you begin, gather all the supplies and tools you'll need. This typically includes car wash soap, automotive degreaser, microfiber towels or wash mitts, a hose or pressure washer, plastic razor blades, isopropyl alcohol or surface cleaner, lint-free cloths, and masking tape.
2. Start with a Thorough Cleaning: Begin by washing your car thoroughly using a high-quality automotive soap. Use a wash mitt or microfiber towels to avoid scratching the paint. Pay attention to the nooks, crevices, and wheel wells to remove any dirt, grime, or debris. Rinse the car with a hose or pressure washer to ensure all soap residues are removed.
3. Remove Contaminants: To eliminate any residual contaminants, apply an automotive degreaser or tar remover to areas with stubborn dirt, grease, or tar spots. Gently scrub with a microfiber cloth or soft brush to loosen and remove the contaminants. Rinse the car again to ensure a clean surface.
4. Inspect the Car's Surface: Carefully inspect your car's surface for any imperfections that could affect the adhesion of the vinyl. Look for paint chips, dents, rust, or any other damage that may need repair before wrapping. It's important to address these issues to ensure a smooth and seamless vinyl application.

5. Address Surface Imperfections: Repair any surface imperfections as needed. Fill in paint chips or scratches with touch-up paint that matches your car's color. For dents or larger repairs, it's advisable to consult a professional auto body technician. Smooth out any rough areas using sandpaper or a sanding block, followed by a thorough cleaning to remove dust and debris.
6. Remove Exterior Accessories: Before wrapping, consider removing any exterior accessories like emblems, badges, or moldings. This will allow for a cleaner and more seamless wrap application. Use plastic razor blades or other non-abrasive tools to carefully remove these items without damaging the car's surface.
7. Final Cleaning and Surface Preparation: To ensure optimal adhesion, wipe down the entire car surface with isopropyl alcohol or a surface cleaner. This will remove any remaining contaminants, oils, or residues. Use lint-free cloths to achieve a clean and dry surface. Pay extra attention to edges, corners, and recessed areas.
8. Mask Off Non-Wrappable Areas: Protect delicate or non-wrappable areas of your car, such as rubber seals, trims, or emblems, by masking them off with painter's tape or low-tack masking tape. This step will prevent accidental wrap application on these areas and make the removal process easier.
By diligently following this step-by-step guide, you'll ensure that your car is properly prepared for vinyl wrapping. Adequate cleaning, surface inspection, and addressing any existing issues will contribute to a successful and professional-looking wrap application. Remember to take your time during the preparation process to achieve the best possible results.
Common Challenges Faced by Novice Car Owners When Wrapping Their Cars
Car wrapping can be an exciting DIY project for novice car owners looking to customize their vehicles. However, it's important to be aware of the common challenges that may arise during the wrapping process. By understanding these challenges and how to overcome them, novice car owners can achieve better results and avoid potential pitfalls. Here are some of the most common challenges faced by novices when wrapping their cars:
1. Inadequate Surface Preparation: One of the primary challenges is insufficient surface preparation. Failing to clean the car properly or address existing imperfections can hinder the adhesion of the vinyl wrap. Novice car owners may overlook the importance of thorough cleaning, removing contaminants, and repairing minor surface issues before applying the wrap. This can lead to bubbles, peeling, or an uneven appearance.
Solution: Take the time to thoroughly clean and inspect the car's surface. Use appropriate cleaning products, degreasers, and surface preparation solutions to ensure a clean, smooth, and dry surface. Address any paint chips, dents, or scratches before proceeding with the wrap.
2. Improper Handling of Vinyl Wraps: Handling and manipulating vinyl wraps can be challenging, especially for beginners. Wrinkles, creases, and misalignment can occur during the application process, resulting in an unprofessional and uneven finish. Stretching the vinyl too much or not enough can also cause problems, particularly around curved or complex areas of the car.
Solution: Practice handling and manipulating small pieces of vinyl before attempting to wrap the entire car. Learn proper stretching and smoothing techniques. Utilize heat guns or torches to help conform the vinyl around curves and contours. Take your time and be patient to achieve a smooth and professional-looking result.

3. Difficulty in Cutting and Trimming: Accurate cutting and trimming of the vinyl wrap are essential for clean edges and a polished appearance. Novice car owners may struggle with achieving precise cuts, especially around intricate areas like door handles, emblems, or curves. Uneven or jagged edges can detract from the overall aesthetic.
Solution: Invest in high-quality cutting tools such as knives, precision blades, or cutting mats. Take measurements carefully and use masking tape as a guide for straight lines. Practice cutting techniques on scrap vinyl to improve accuracy and achieve clean edges.
4. Air Bubbles and Wrinkles: Air bubbles and wrinkles can be a common frustration during car wrapping. They can occur due to trapped air or improper smoothing of the vinyl. Novice car owners may find it challenging to eliminate bubbles and wrinkles, leading to an unprofessional finish.
Solution: Use a squeegee or application tool to smooth out the vinyl carefully, starting from the center and working towards the edges. Apply firm but gentle pressure to eliminate air bubbles and wrinkles. If stubborn bubbles persist, use a small pin or needle to create a tiny hole and then smooth out the area.
5. Lack of Experience and Knowledge: The lack of experience and knowledge about car wrapping techniques, materials, and tools can be a significant challenge for novice car owners. Without proper guidance and understanding, they may struggle to achieve satisfactory results.
Solution: Research and educate yourself about car wrapping techniques, best practices, and potential challenges. Watch tutorial videos, read guides, and seek advice from experienced professionals or online communities. Consider starting with smaller wrapping projects to gain confidence and experience before tackling larger areas of the car.
Overcoming these challenges requires patience, practice, and a willingness to learn. Novice car owners should approach car wrapping as a step-by-step process, investing time in preparation, practicing techniques, and seeking guidance when needed. By addressing these common challenges head-on, novice car owners can enhance their skills and achieve impressive results in their car wrapping endeavors.
Expert Tips and Tricks: Overcoming Difficulties in Car Wrapping
Car wrapping can be a complex and meticulous process, requiring attention to detail and precision. Even experienced car owners and installers may encounter difficulties along the way. However, with the right tips and tricks, you can overcome these challenges and achieve professional-quality results. Here are some expert tips and tricks to help you navigate the difficulties in car wrapping:
1. Thorough Surface Preparation: Proper surface preparation is crucial for a successful wrap. Start by thoroughly cleaning the car to remove dirt, grease, and contaminants that can hinder the adhesion of the vinyl. Use automotive-specific cleaning products and degreasers. After cleaning, inspect the surface for imperfections and address them before proceeding. This includes repairing paint chips, scratches, or dents and ensuring a smooth and uniform surface.
2. Use a Heat Gun or Torch: Applying heat is a valuable technique when it comes to wrapping cars, especially around curves, recessed areas, and complex contours. Utilize a heat gun or torch to soften the vinyl, making it more pliable and stretchable. Apply gentle heat while using a squeegee to mold the vinyl around these challenging areas. Be cautious not to overheat the vinyl, as it can cause damage or discoloration.
3. Stretching Techniques: Proper stretching techniques are essential to achieve a smooth and wrinkle-free wrap. Stretch the vinyl gradually and evenly to ensure consistent tension. Avoid excessive stretching, as it can lead to thinning and potential failure of the vinyl. Work in small sections and use a combination of heat, squeegees, and your hands to stretch and conform the vinyl around curves and edges.

4. Knifeless Tape for Cutting: Achieving clean and precise cuts is crucial for a professional-looking wrap. Knifeless tape is a handy tool that allows you to create precise cut lines without the risk of damaging the car's paintwork. Simply apply the tape along the desired cutting line, then pull a string or filament through the tape to make a clean cut. This technique is particularly useful for intricate areas and curves.
5. Wet Application Method: When applying the vinyl wrap, consider using the wet application method. This involves spraying a mixture of water and a few drops of mild soap onto the surface before placing the vinyl. The solution acts as a lubricant, allowing you to reposition and slide the vinyl into place easily. Once positioned correctly, use a squeegee to remove excess liquid and air bubbles. The wet method helps prevent premature adhesion and allows for adjustments during the installation.
6. Post-Heating for Adhesion and Settling: After applying the vinyl, use a heat gun or torch to post-heat the wrapped areas. Post-heating helps activate the adhesive, ensuring optimal bonding and adhesion. It also aids in settling the vinyl and eliminating any remaining minor wrinkles or imperfections. Apply moderate heat evenly across the wrapped surface while using a squeegee to ensure proper adhesion and a smooth finish.
7. Practice and Patience: Car wrapping is a skill that improves with practice. Take your time, be patient, and don't rush the process. Start with smaller sections or less visible areas of the car to gain experience and confidence. Learn from each wrapping project, identifying areas for improvement and implementing new techniques along the way.
Remember, difficulties in car wrapping are often part of the learning process. By following expert tips and tricks, staying patient, and being open to learning, you can overcome these challenges and achieve impressive results. Continuously expand your knowledge, seek guidance from experienced installers, and embrace the opportunity to refine your skills. With practice and determination, you can become adept at car wrapping and achieve professional-quality wraps that transform the appearance of your vehicle.
FAQ for is it hard to wrap a car?
Q: Is car wrapping a difficult task?
A: Car wrapping can be challenging, especially for beginners. It requires attention to detail, patience, and practice to achieve professional-looking results.
Q: Can I wrap my car myself?
A: Yes, car wrapping can be done as a DIY project. However, it requires proper preparation, knowledge of techniques, and access to necessary tools to achieve satisfactory results.
Q: How long does it take to wrap a car?
A: The time required to wrap a car depends on several factors, including the size of the vehicle, complexity of the design, and the installer's skill level. It can take anywhere from a few days to a week or more for a complete wrap.
Q: What skills are needed to wrap a car?
A: Car wrapping requires skills such as surface preparation, vinyl handling and application, cutting and trimming, and attention to detail. Practice and experience can help develop these skills.
Q: Can I wrap a car with paint damage or rust?
A: It is not recommended to wrap a car with extensive paint damage or rust. The wrap may not adhere properly and could exacerbate the underlying issues. It is advisable to address any existing paint or rust problems before proceeding with a wrap.
Final Words
In conclusion, the journey from being a novice to a pro in car wrapping can be filled with challenges, but with the right approach and mindset, you can overcome them and achieve impressive results. By understanding the basics of materials, tools, and surface preparation, you lay a strong foundation for a successful wrap. Embracing expert tips and tricks, such as using heat, practicing stretching techniques, and employing knifeless tape, can help you navigate the complexities of the process.
Remember, practice and patience are key, and each project is an opportunity to refine your skills. Whether you choose to embark on a DIY adventure or seek professional assistance, the satisfaction of transforming your car's appearance is within reach. So, don't be discouraged by the challenges—embrace them, learn from them, and enjoy the rewarding experience of becoming a proficient car wrapper. Happy wrapping!