Different Types of Car Wraps: Exploring Vinyl, Matte, and Gloss Finishes
When it comes to car wrapping, one of the first decisions you'll need to make is choosing the right type of wrap material and finish. Vinyl wraps have gained popularity in recent years for their ability to transform the appearance of a vehicle quickly and cost-effectively. Within the realm of vinyl wraps, two popular options are matte and gloss finishes. In this article, we will explore these different types of car wraps, highlighting their unique characteristics and helping you make an informed decision for your car makeover.
1. Vinyl Wraps: Vinyl wraps are made from a durable and flexible material called polyvinyl chloride (PVC). They are specifically designed to adhere to the surface of your vehicle, providing a protective layer while changing its color or appearance. Vinyl wraps offer several advantages, such as protecting the original paintwork from scratches, UV rays, and minor abrasions. They also allow for easy removal without causing damage to the vehicle's surface.
2. Matte Wraps: Matte finishes have gained popularity among car enthusiasts for their sleek and understated appearance. A matte wrap provides a non-glossy, flat finish, which can give your vehicle a unique and distinctive look. It tends to absorb light rather than reflect it, resulting in a more subdued and elegant aesthetic. Matte wraps are often chosen for luxury or sports cars, as they can enhance their overall appeal and create a sense of sophistication.
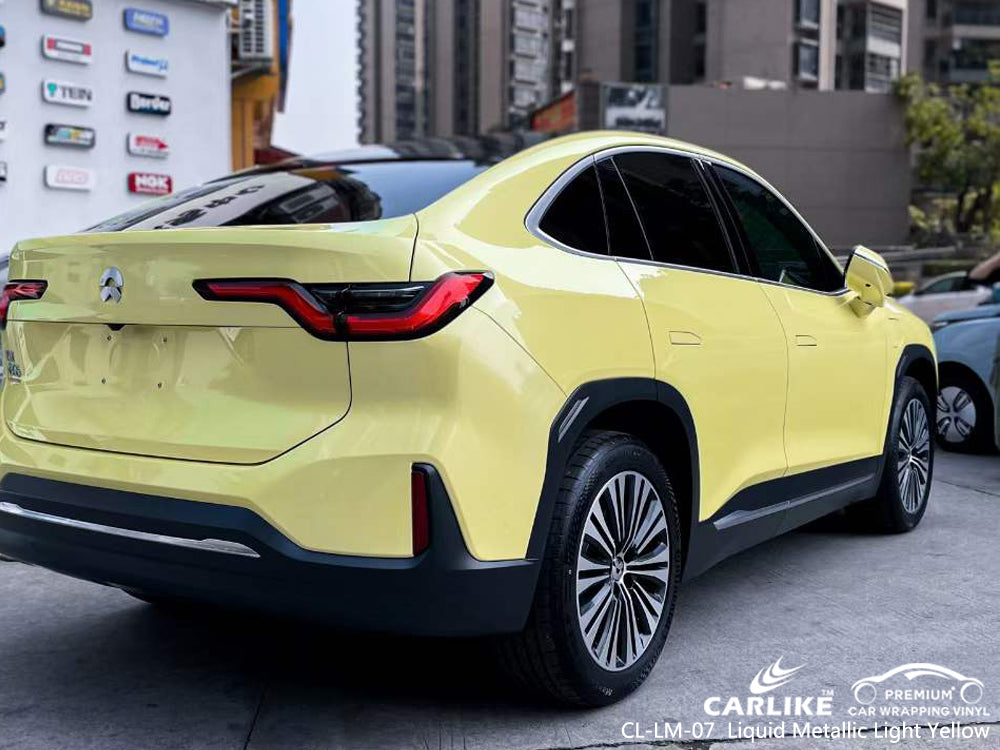
3. Gloss Wraps: On the other end of the spectrum, gloss finishes offer a shiny and reflective surface that adds depth and vibrancy to a car's appearance. Gloss wraps are known for their ability to mimic the look of a freshly painted vehicle, giving it a showroom-like finish. This type of wrap can make any car stand out, particularly in vibrant colors or metallic shades. Gloss wraps are a popular choice for those seeking a bold and attention-grabbing look.
Both matte and gloss finishes have their own advantages and considerations:
- Matte finishes tend to be more forgiving when it comes to hiding minor imperfections or surface blemishes, making them easier to maintain in the long run.
- Gloss finishes are excellent at reflecting light, creating a more dynamic and glossy appearance. However, they are more prone to showing scratches or swirl marks, requiring extra care and attention during maintenance.
When deciding between matte and gloss finishes, it's essential to consider your personal preferences, the style you want to achieve, and the overall aesthetic of your vehicle. It's also worth noting that some car owners opt for a combination of matte and gloss wraps to create a unique and eye-catching design.
In conclusion, understanding the different types of car wraps, including vinyl, matte, and gloss finishes, allows you to make an informed decision when transforming the appearance of your vehicle. Whether you prefer the understated elegance of a matte finish or the bold and glossy look of a gloss finish, car wraps provide a versatile and customizable option for achieving a jaw-dropping car makeover.

Essential Tools and Materials for Car Wrapping: A Comprehensive Checklist
Car wrapping is a meticulous process that requires the right tools and materials to ensure a successful and professional-looking result. Whether you're a DIY enthusiast or a professional installer, having the necessary equipment at hand can make all the difference in achieving a flawless car wrap. In this article, we'll provide you with a comprehensive checklist of the essential tools and materials you'll need for a car wrapping project.
1. Vinyl Wrap: The foundation of any car wrap is the vinyl material itself. There are various types of vinyl wraps available, including cast vinyl and calendared vinyl. Cast vinyl is typically preferred for its conformability and durability, making it ideal for complex curves and contours of a vehicle. Calendared vinyl is more affordable but may not have the same longevity or conformability. Choose a high-quality vinyl wrap in your desired color or finish, such as matte or gloss.
2. Squeegees: Squeegees are essential tools for ensuring proper adhesion and removing air bubbles during the application process. Look for squeegees specifically designed for car wrapping, featuring a felt or microfiber edge to prevent scratches on the vinyl surface. Different sizes and shapes of squeegees can be beneficial for working on different areas of the vehicle, such as curved or narrow sections.
3. Heat Gun or Heat Gun Torch: A heat gun or heat gun torch is used to heat the vinyl wrap during the installation process. Heat softens the material, making it more pliable and allowing it to stretch and conform to the contours of the vehicle. This tool is crucial for achieving a smooth and seamless finish, especially around curved areas, edges, and corners.
4. Knife or Precision Cutting Tool: A sharp knife or precision cutting tool is necessary for trimming excess vinyl wrap and achieving clean and precise cuts. Ensure that the blade is sharp and replaceable to avoid tearing or damaging the vinyl. Additionally, consider having a variety of cutting tools such as a utility knife, precision blades, and curved blades to accommodate different cutting requirements.
5. Cleaning Supplies: Proper surface preparation is vital for a successful car wrap. Gather cleaning supplies such as car wash soap, microfiber cloths, lint-free towels, and isopropyl alcohol or a specialized vinyl cleaning solution. These will help you thoroughly clean and remove any dirt, dust, wax, or contaminants from the vehicle's surface before applying the vinyl wrap.

6. Tack Cloth: A tack cloth is a sticky cloth used to remove any remaining dust or particles from the vehicle's surface after cleaning. This step is crucial to ensure a clean surface for optimal vinyl adhesion.
7. Measuring Tape and Cutting Mat: Accurate measurements are essential for cutting the vinyl wrap to fit specific areas of the vehicle. A measuring tape and cutting mat can help you measure and cut the vinyl accurately, minimizing waste and ensuring a precise fit.
8. Gloves: Wearing gloves, such as nitrile or latex gloves, is recommended during the car wrapping process. Gloves not only protect your hands from the adhesives but also help prevent oils and dirt from transferring onto the vinyl, ensuring a clean and pristine application.
9. Removable Adhesive Tape: Removable adhesive tape, such as painter's tape, can be used to secure the vinyl temporarily in place or to create guidelines for alignment and positioning. It allows you to make adjustments or reposition the vinyl without damaging the paint or the vinyl itself.
10. Air Release Tool or Needle: An air release tool or needle is used to puncture and release trapped air bubbles that may occur during the vinyl installation process. This tool helps ensure a smooth and bubble-free finish.
In conclusion, having the right tools and materials is crucial for a successful car wrapping project.
Step-by-Step Guide: Applying a Car Wrap to Different Parts of Your Vehicle
Applying a car wrap is a detailed process that requires precision and attention to detail. To achieve a professional-looking result, it's important to follow a step-by-step guide when wrapping different parts of your vehicle. In this article, we will provide you with a comprehensive guide on how to apply a car wrap to various areas of your vehicle, ensuring a seamless and eye-catching finish.
1. Preparing the Surface: Before applying the car wrap, it's crucial to ensure that the surface is clean and free from any dirt, dust, wax, or contaminants. Thoroughly wash the vehicle using car wash soap and water, and dry it using lint-free towels or microfiber cloths. You may also use isopropyl alcohol or a specialized vinyl cleaning solution to remove any remaining residue. This step is essential for optimal adhesion and longevity of the car wrap.
2. Measuring and Cutting: Measure and cut the vinyl wrap to fit the specific area of the vehicle you are wrapping. Use a measuring tape to determine the dimensions needed and a cutting mat to ensure accurate and precise cuts. It's important to leave some excess vinyl around the edges to allow for adjustments during the installation process.
3. Positioning and Aligning: Begin by positioning the vinyl wrap onto the desired area of the vehicle. Use removable adhesive tape, such as painter's tape, to temporarily secure the vinyl in place or to create alignment guidelines. Take your time to ensure proper positioning and alignment, making sure the vinyl is centered and level with the edges of the panel.
4. Applying the Vinyl: Starting from one end of the panel, begin applying the vinyl wrap by gradually removing the backing paper. Use a squeegee to press the vinyl onto the surface, working from the center towards the edges in smooth and even strokes. Apply firm and consistent pressure to ensure proper adhesion and to remove any air bubbles.
5. Stretching and Conforming: As you work your way along the panel, you may encounter curved areas, edges, or contours of the vehicle. In these instances, a heat gun or heat gun torch can be used to warm the vinyl, making it more pliable and easier to stretch and conform. Apply heat carefully, being cautious not to overheat or damage the vinyl. Use the heat gun to soften the vinyl, allowing it to mold and adhere smoothly around the curves and edges.

6. Trimming Excess Vinyl: Once the vinyl wrap is applied to the entire area, use a sharp knife or precision cutting tool to trim the excess vinyl. Carefully cut along the edges of the panel, following the body lines or creases of the vehicle. Take your time and make clean and precise cuts to achieve a professional finish. Remember to be cautious when cutting near paintwork or other delicate surfaces to avoid any accidental damage.
7. Removing Air Bubbles: After the vinyl is applied, inspect the surface for any air bubbles that may have formed. Use an air release tool or needle to gently puncture and release the trapped air. Start from one end and work your way towards the other, smoothing out any bubbles as you go. Apply pressure with the squeegee to ensure the vinyl is securely adhered to the surface.
8. Repeating the Process: Repeat the above steps for each area of the vehicle you intend to wrap, such as doors, hood, roof, fenders, and bumpers. Take your time and maintain a consistent approach throughout the installation process to achieve a cohesive and seamless look.
9. Finishing Touches: Once all areas are wrapped, step back and inspect the vehicle to ensure a smooth and flawless finish. Use a heat gun to apply gentle heat to any areas that may require additional stretching or conforming. Finally, give the entire car wrap a final pass with the squeegee to ensure proper adhesion and a clean appearance.
By following this step-by-step guide, you can confidently apply a car wrap to different parts of your vehicle, transforming its appearance and achieving a professional-quality finish. Remember to take your time, be patient, and pay attention to detail to ensure a stunning and long-lasting result.
Avoiding Common Mistakes: Tips and Tricks for a Seamless Car Wrap
Even the smallest errors can affect the overall appearance and durability of the wrap. In this article, we will provide you with valuable tips and tricks to help you avoid common mistakes and ensure a seamless car wrap.
1. Thorough Surface Preparation: One of the most critical steps in car wrapping is properly preparing the surface of the vehicle. Thoroughly clean the surface, removing any dirt, dust, wax, or contaminants that could hinder the adhesion of the vinyl wrap. Ensure that the surface is dry before applying the wrap to prevent trapped moisture or air bubbles.
2. Avoiding Stretching the Vinyl Too Much: While some stretching is necessary to conform the vinyl to the curves and contours of the vehicle, excessive stretching can lead to visible distortions and compromised adhesion. Stretch the vinyl gradually and evenly, using heat to soften the material when needed. Be mindful of overstretching, especially around sharp corners and edges, as it can cause the vinyl to lift or pull away over time.
3. Eliminating Air Bubbles: Air bubbles are a common issue during the car wrapping process and can significantly impact the final appearance. To avoid air bubbles, use a squeegee with a felt or microfiber edge to press the vinyl firmly onto the surface, starting from the center and working towards the edges. Apply even and consistent pressure while smoothing out the vinyl to eliminate any trapped air. If air bubbles do occur, use an air release tool or needle to puncture and release the air, then press the vinyl back down to achieve a seamless finish.
4. Taking Care When Cutting and Trimming: Accurate cutting and trimming are crucial for achieving clean lines and precise fits. Take your time when cutting the vinyl, using a sharp knife or precision cutting tool. Be cautious not to cut too deeply, as it can damage the vehicle's paint or underlying surfaces. Use a cutting mat to protect the vehicle and ensure clean and precise cuts along edges and body lines.

FAQ for how to wrap a car?
Q: Can I wrap my car myself, or should I hire a professional?
A: Car wrapping can be done by both professionals and DIY enthusiasts. However, it requires skill, patience, and attention to detail. If you're not confident in your abilities, it's recommended to hire a professional for a flawless result.
Q: How long does a car wrap last?
A: The lifespan of a car wrap depends on various factors, such as the quality of the vinyl, climate conditions, and maintenance. Generally, a high-quality vinyl wrap can last between 5 to 7 years with proper care.
Q: Can I wrap a car with existing paint damage or scratches?
A: It's not recommended to apply a car wrap over existing paint damage or scratches. The vinyl wrap will not conceal or repair the damage, and it may even accentuate the imperfections. It's advisable to address any paint issues before proceeding with the wrap.
Q: How do I prepare the car's surface before applying the wrap?
A: To prepare the car's surface, thoroughly clean it using car wash soap and water, removing all dirt, dust, and contaminants. Dry the surface completely before applying the vinyl wrap.
Q: Is it necessary to remove any parts or accessories before wrapping a car?
A: Depending on the complexity of the wrap and the parts/accessories involved, it may be necessary to remove certain components, such as side mirrors, door handles, or badges. This ensures a cleaner and more professional result. Consult with a professional or follow specific instructions for your vehicle.
Final Words
In conclusion, mastering the art of car wrapping can truly transform your vehicle and give it a jaw-dropping makeover. By following the step-by-step tutorial provided in this blog post, you have gained valuable insights and knowledge on how to achieve a seamless and professional-looking car wrap. Remember to start with proper surface preparation, take your time during the application process, and pay attention to detail at every step. Whether you're a DIY enthusiast or decide to seek the expertise of a professional, the key is to approach the task with patience, precision, and a creative vision.
With your newfound skills, you're well on your way to creating a stunning and personalized car wrap that will turn heads on the road. So go ahead, unleash your creativity, and embark on your car wrapping journey to make your vehicle a true reflection of your style and personality. Happy wrapping!


