Choosing the Right Car Wrap Material: A Beginner's Guide
Choosing the right car wrap material is a crucial step when it comes to DIY car wrapping. The material you select will not only impact the final look of your vehicle but also its durability and ease of installation. In this beginner's guide, we will explore the various car wrap materials available and help you make an informed decision.
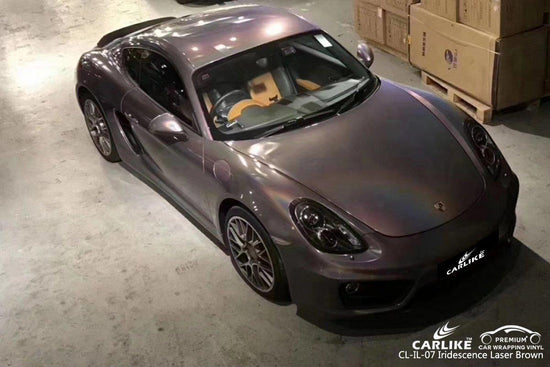
1. Vinyl Wraps: Vinyl is the most popular and widely used material for car wrapping. It is known for its versatility, durability, and wide range of color and finish options. Vinyl wraps are available in glossy, matte, satin, metallic, and textured finishes, allowing you to personalize your vehicle according to your style preferences. They also provide protection against UV rays, minor scratches, and stone chips. Vinyl wraps are relatively easier to install compared to other materials, making them suitable for beginners.
2. Cast Vinyl vs. Calendered Vinyl: Within the realm of vinyl wraps, there are two main types: cast vinyl and calendered vinyl. Cast vinyl is considered the premium option as it is more pliable, conformable, and provides better longevity. It molds to the curves and contours of your vehicle, resulting in a seamless and professional-looking finish. Calendered vinyl, on the other hand, is more affordable but is slightly less conformable and may not offer the same level of durability as cast vinyl. However, calendered vinyl can still be a good choice for budget-conscious car owners.

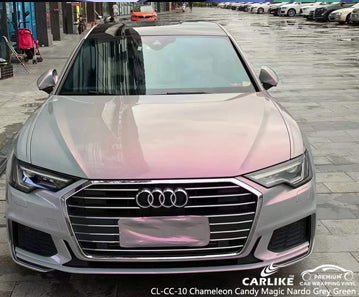
3. Color Change Wraps vs. Printed Wraps: Car wraps can be categorized into color change wraps and printed wraps. Color change wraps are available in solid colors and allow you to completely transform the appearance of your vehicle. They provide a clean and uniform finish and are a popular choice for those who want to give their car a new look. Printed wraps, on the other hand, offer endless design possibilities. They can feature complex graphics, patterns, or even custom artwork. Printed wraps are perfect for those who want to make a bold statement or advertise their business on their vehicle.
4. Specialty Wraps: In addition to vinyl wraps, there are specialty materials available for specific purposes. For example, chrome wraps give your car a reflective, mirror-like finish that stands out. Carbon fiber wraps mimic the appearance of real carbon fiber and add a sporty and high-end look to your vehicle. Reflective wraps feature a reflective surface that enhances visibility at night, making them popular among emergency vehicles and commercial fleets. These specialty wraps can add uniqueness and visual interest to your car, but they may require more advanced installation techniques.
5. Considerations for Installation: When choosing a car wrap material, it's important to consider your skill level and the complexity of installation. Some materials, such as vinyl wraps, are more forgiving and can be repositioned during the installation process. Others, like chrome or specialty wraps, may be more challenging to install due to their unique properties. It's crucial to follow proper installation techniques and seek professional help if you're unsure about your abilities.
In conclusion, choosing the right car wrap material is essential to achieve a successful DIY car wrapping project. Consider factors such as durability, finish options, ease of installation, and your desired look when making your decision. By selecting the appropriate material, you can personalize your wheels and transform your vehicle into a unique and eye-catching ride.

Essential Tools and Equipment for DIY Car Wrapping
When embarking on a DIY car wrapping project, having the right tools and equipment is crucial for a successful and professional-looking result. This guide will walk you through the essential tools and equipment you'll need to ensure a smooth and efficient car wrapping process.
1. Utility Knife: A sharp utility knife with replaceable blades is a must-have tool for car wrapping. It is used to trim excess vinyl, make precise cuts around edges and corners, and remove any imperfections during the installation process.
2. Squeegee: A squeegee is an essential tool for smoothing out the vinyl and removing air bubbles. Look for a squeegee specifically designed for car wrapping, preferably one with a felt edge to prevent scratching the vinyl surface.
3. Heat Gun or Torch: Heat is critical for the proper stretching and conforming of vinyl wraps. A heat gun or torch helps you warm the vinyl, making it more pliable and allowing it to conform to the curves and contours of your vehicle. Be sure to use the heat source carefully and maintain a safe distance to avoid overheating or damaging the vinyl.
4. Microfiber Cloths: Microfiber cloths are gentle on the vinyl and are ideal for cleaning the surface of your vehicle before wrapping. They help remove dust, dirt, and any residue that may affect the adhesion of the vinyl.
5. Isopropyl Alcohol or Cleaning Solution: Proper surface preparation is crucial for a successful car wrap installation. Isopropyl alcohol or a suitable cleaning solution helps remove grease, wax, and other contaminants from the car's surface, ensuring optimal adhesion of the vinyl.

6. Tack Cloth: A tack cloth is a sticky cloth that removes fine dust particles from the car's surface after cleaning. It ensures a clean and dust-free surface, which is essential for a smooth and flawless application of the vinyl wrap.
7. Measuring Tape: Accurate measurements are essential to ensure the proper sizing and alignment of the vinyl. A measuring tape allows you to measure various areas of your vehicle accurately and helps you plan the cuts and overlaps of the vinyl wrap.
8. Air Release Tool: An air release tool, also known as a bubble popper or pin tool, is used to puncture and release air bubbles that may occur during the wrapping process. It helps achieve a smooth and bubble-free finish.
9. Masking Tape: Masking tape is useful for temporarily holding the vinyl in place while you position and align it. It allows you to make adjustments before finalizing the placement and ensures precise application.
10. Work Gloves: Work gloves protect your hands from potential cuts, abrasions, and chemical exposure during the car wrapping process. They provide a better grip when handling tools and materials and help prevent fingerprints on the vinyl.
Remember, safety is paramount during any DIY project. Consider using protective eyewear and gloves, and work in a well-ventilated area. Additionally, it's important to follow manufacturer instructions for each tool and equipment to ensure proper usage and maximize their effectiveness.
By having these essential tools and equipment at your disposal, you'll be well-prepared to tackle your DIY car wrapping project with confidence and achieve professional results.
Preparing Your Vehicle for Car Wrapping: Cleaning and Surface Preparation
Preparing your vehicle properly before car wrapping is crucial to ensure a flawless and long-lasting result. This guide will provide a detailed explanation of the cleaning and surface preparation steps necessary to achieve optimal adhesion and a professional finish for your car wrap.
1. Cleaning the Surface: Before starting the car wrapping process, thoroughly clean the surface of your vehicle. Begin by rinsing the car with water to remove loose dirt and debris. Then, use a car wash soap or a gentle detergent to wash the entire vehicle, including the areas where the wrap will be applied. Pay extra attention to areas prone to dirt buildup, such as the wheel wells and lower parts of the vehicle. Use a soft sponge or microfiber mitt to avoid scratching the paint.
2. Removing Contaminants: After washing, it's essential to remove any contaminants that could affect the adhesion of the vinyl wrap. One effective method is to use isopropyl alcohol (70% concentration or higher) and a clean microfiber cloth. Apply the alcohol to the cloth and gently wipe the surface of the vehicle, paying attention to areas where wax, grease, or other residues may be present. This step ensures that the vinyl adheres properly to the paint or clear coat.
3. Surface Decontamination: Even after washing and wiping with alcohol, there may still be traces of contaminants on the surface. To remove any remaining impurities, consider using a dedicated surface decontamination product such as a clay bar. Clay bars help remove embedded contaminants like tar, tree sap, or industrial fallout. Follow the instructions provided with the clay bar and lubricate the surface with a clay lubricant or a mixture of water and car wash soap to prevent scratching the paint.

4. Paint Correction: If your vehicle has scratches, swirl marks, or other imperfections, it's recommended to perform a paint correction process before car wrapping. Paint correction involves polishing or compounding the paint surface to remove scratches and restore its smoothness and gloss. This step is crucial because vinyl wraps can accentuate any underlying imperfections in the paint. Consider seeking professional help or doing thorough research to learn the proper techniques and tools for paint correction.
5. Drying the Surface: After completing the cleaning and decontamination steps, ensure that the vehicle's surface is completely dry before applying the vinyl wrap. Use a clean microfiber towel to dry the car thoroughly, paying extra attention to areas with crevices, such as door handles and side mirrors. Any residual moisture can hinder the adhesion of the vinyl and may cause bubbling or lifting.
6. Removing Accessories: Before proceeding with the car wrapping process, it's advisable to remove any removable accessories or parts that might interfere with the wrapping, such as emblems, moldings, or antenna. This step allows for a smoother and more precise installation.
By following these steps for cleaning and surface preparation, you create an ideal foundation for the vinyl wrap to adhere to your vehicle's surface. Properly preparing the surface ensures better adhesion, reduces the risk of lifting or bubbling, and ultimately contributes to a high-quality and professional-looking finish.
Step-by-Step Instructions: Wrapping Different Areas of Your Car
Wrapping different areas of your car requires careful attention to detail and precise techniques to achieve a seamless and professional result. In this step-by-step guide, we'll provide detailed instructions for wrapping various areas of your vehicle.
1. Preparation: Before starting the wrapping process, ensure that you have the necessary tools and materials readily available. This includes the vinyl wrap, utility knife, squeegee, heat gun, and any other tools specific to the area you'll be wrapping.
2. Plan and Measure: Begin by planning the layout and measuring the area you intend to wrap. Consider the shape, contours, and any obstacles, such as door handles or emblems. Measure and cut the vinyl wrap with extra allowance to ensure you have enough material to work with.
3. Positioning the Vinyl: Start by positioning the vinyl wrap over the targeted area, aligning it carefully to achieve the desired placement. Use masking tape to hold the vinyl in place temporarily while you make adjustments and ensure proper alignment.
4. Applying the Vinyl: Once the vinyl is properly positioned, begin applying it to the surface using your hands. Start from the center and work your way outward, using light pressure to smooth out the vinyl and avoid air bubbles. You can use a squeegee to assist in the process, working in a sweeping motion from the center towards the edges.
5. Stretching and Conforming: As you work with the vinyl, you may encounter curved or contoured areas. In such cases, use a heat gun or torch to warm the vinyl, making it more pliable. Gently stretch and conform the vinyl around the curves and contours of the surface, taking care to avoid excessive stretching that could cause the material to thin out or distort.

6. Trimming Excess Vinyl: Once the vinyl is applied and conforming properly, use a utility knife to trim the excess material. Make precise cuts along the edges and around obstacles like door handles or emblems. Take your time and use a steady hand to achieve clean and accurate cuts, ensuring a professional finish.
7. Dealing with Corners and Edges: Corners and edges require special attention to ensure a neat and seamless appearance. To wrap corners, create relief cuts or relief slits in the vinyl, allowing it to overlap smoothly and conform without creasing or bunching. Use a heat gun to warm the vinyl as needed, making it more flexible and easier to manipulate. For edges, ensure that the vinyl wraps over the surface and slightly onto the backside to provide complete coverage and prevent any visible edges.
8. Working Around Obstacles: When wrapping areas with obstacles like door handles or emblems, use precise cutting techniques to create custom wraps around these elements. Take your time to achieve a clean and seamless integration, using a combination of stretching, conforming, and trimming to ensure a professional finish.
9. Finishing Touches: Once the wrapping process is complete, go over the wrapped area with a heat gun or torch to apply gentle heat and activate the adhesive fully. This helps the vinyl adhere securely to the surface and ensures any remaining air bubbles are eliminated. Use a squeegee or your hands to press out any trapped air, working from the center towards the edges.
10. Inspection and Final Adjustments: After completing the wrapping process, carefully inspect the wrapped area for any imperfections, air bubbles, or areas that require additional trimming or adjustments. Make any necessary corrections to achieve a flawless and seamless finish.
By following these step-by-step instructions, you'll be able to wrap different areas of your car with precision and achieve a professional-quality result. Remember to practice patience, pay attention to detail, and take your time during each stage of the process to ensure a successful car wrapping project.
FAQ for can you wrap your own car?
Q: How difficult is it to wrap a car on your own?
A: Wrapping a car on your own can be moderately challenging, especially if you're new to the process. However, with proper research, preparation, and practice, it is achievable for many car owners.
Q: What are the advantages of wrapping your own car?
A: Wrapping your own car allows you to save money on professional installation costs, gives you creative control over the design, and allows you to learn a new skill.
Q: What tools and materials do I need to wrap my own car?
A: The essential tools for car wrapping include a utility knife, squeegee, heat gun or torch, microfiber cloths, isopropyl alcohol or cleaning solution, measuring tape, and masking tape. The main material needed is vinyl wrap in the color and finish of your choice.
Q: How long does it take to wrap a car on your own?
A: The time required to wrap a car on your own depends on various factors such as the size of the vehicle, your experience level, and the complexity of the design. It can take several days to a week or more for beginners.
Q: What are the common mistakes to avoid when wrapping your own car?
A: Common mistakes to avoid include insufficient surface preparation, improper trimming of the vinyl, not using enough heat during installation, rushing the process, and failing to plan the layout and alignment properly.
Final Words
In conclusion, DIY car wrapping offers car owners an exciting opportunity to personalize their vehicles and make a unique statement on the road. With the right tools, materials, and a step-by-step approach, you can embark on a rewarding journey of transforming your car's appearance. From choosing the right car wrap material to preparing your vehicle's surface, and wrapping different areas with precision, this beginner's guide has provided you with the essential knowledge to get started. Remember to exercise patience, practice, and attention to detail throughout the process.
Whether you're seeking a bold color change, a striking design, or a protective layer for your car's paint, DIY car wrapping allows you to unleash your creativity and create a vehicle that reflects your style. So, gear up, embrace the challenge, and enjoy the satisfaction of seeing your wheels transformed into a unique masterpiece on the road. Happy wrapping!