The Benefits of DIY Car Wrapping: Saving Money and Personalizing Your Vehicle
DIY car wrapping offers numerous benefits, ranging from cost savings to the ability to personalize your vehicle according to your unique preferences. By taking on the task yourself, you can transform your ride into a customized masterpiece while staying within a budget. Here are some key advantages of DIY car wrapping:
1. Cost Savings: One of the most significant advantages of DIY car wrapping is the potential for substantial cost savings. Professional car wrapping services can be quite expensive, often costing several thousand dollars. By opting for a DIY approach, you can save a significant amount of money, as you only need to invest in the materials and tools required for the job.
2. Personalization: DIY car wrapping allows you to unleash your creativity and personalize your vehicle to reflect your individual style. Whether you prefer a sleek and elegant look or a vibrant and eye-catching design, you have the freedom to choose from a wide range of colors, patterns, and finishes. It enables you to transform your car into a unique representation of your personality and preferences.
3. Flexibility and Variety: With DIY car wrapping, you have the flexibility to experiment with different looks and designs. If you ever get tired of the current wrap, you can easily remove it and try something new without incurring significant expenses. This flexibility enables you to stay up to date with the latest trends or switch up your vehicle's appearance to match different occasions or seasons.

4. Protection: Car wraps not only enhance the aesthetics of your vehicle but also provide an additional layer of protection to the original paintwork. The vinyl wrap acts as a barrier, shielding your car's paint from minor scratches, UV rays, and other environmental elements. This protection can help maintain the resale value of your vehicle and keep it looking newer for longer.
5. Easy Maintenance: DIY car wraps are relatively low-maintenance compared to traditional paint jobs. They are designed to withstand daily wear and tear, and their durable nature makes them resistant to fading and chipping. In case of any damage, repairing or replacing a small section of the wrap is typically more affordable and easier than repainting an entire car.
6. Reversibility: Unlike permanent alterations to your vehicle's appearance, DIY car wraps offer the advantage of being reversible. If you decide to sell your car or change your mind about the wrap, you can remove it without causing any damage to the original paint. This flexibility allows you to restore your vehicle to its original condition whenever you desire.
In summary, DIY car wrapping is a cost-effective and customizable solution for revamping your ride. By embracing this creative and budget-friendly option, you can enjoy the benefits of cost savings, personalization, protection, and flexibility. It's a rewarding process that empowers car owners to express their individuality and transform their vehicles into unique works of art.

Essential Tools and Materials for DIY Car Wrapping on a Budget
Embarking on a DIY car wrapping project can be an exciting and cost-effective way to revamp your vehicle's appearance. To ensure successful results while staying on a budget, it's essential to have the right tools and materials at your disposal. Here's a comprehensive explanation of the essential tools and materials you'll need for DIY car wrapping on a budget:
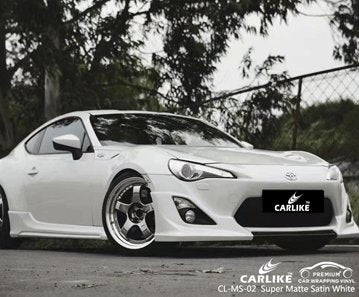
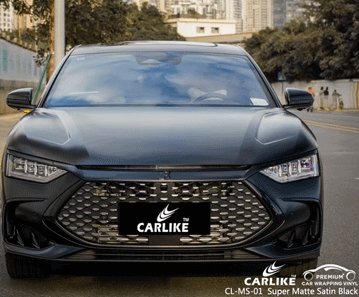
1. Vinyl Wrap: The most critical material for car wrapping is the vinyl wrap itself. Opt for high-quality vinyl wraps that are specifically designed for automotive applications. These wraps come in various colors, finishes, and patterns, allowing you to achieve the desired look for your vehicle. It's recommended to purchase slightly more vinyl than needed to account for mistakes and repositioning.
2. Squeegees: Squeegees are indispensable tools for smoothing out the vinyl wrap and ensuring a bubble-free application. Look for squeegees with a felt or fabric edge to prevent scratching or damaging the vinyl surface. A soft and flexible squeegee will help you achieve a smooth finish and properly adhere the vinyl to the contours of your car.
3. Heat Gun or Hair Dryer: Heat is crucial for manipulating the vinyl wrap and conforming it to the shape of your vehicle. A heat gun or a hairdryer can be used to warm the vinyl, making it more pliable and allowing for easier stretching and molding around curves, edges, and contours.
4. Cutting Tools: You'll need a sharp utility knife or precision cutting tool to trim the excess vinyl and make precise cuts during the wrapping process. A quality cutting tool will help you achieve clean lines and neatly finish the edges of the wrap.
5. Cleaning Supplies: Proper surface preparation is vital for a successful car wrapping project. Ensure you have appropriate cleaning supplies such as car wash soap, a microfiber cloth, and a degreasing agent to thoroughly clean and remove any dirt, dust, or residue from your vehicle's surface before applying the vinyl wrap.

6. Primer or Adhesion Promoter: Depending on the condition of your vehicle's paint and the type of vinyl wrap you're using, you may need a primer or adhesion promoter. These products help enhance the bond between the vinyl and the car's surface, ensuring better adhesion and longevity of the wrap.
7. Masking Tape: Masking tape is useful for marking reference points, creating guidelines, and securing sections of the vinyl wrap in place before finalizing the positioning. Use a low-tack masking tape that won't leave adhesive residue or damage the surface of the wrap.
8. Isopropyl Alcohol: Isopropyl alcohol is effective for cleaning the surface of your vehicle before applying the vinyl wrap. It helps remove any wax, grease, or other contaminants that could hinder the adhesive bond between the vinyl and the car's paint.
9 .Lint-Free Cloths: Lint-free cloths or microfiber towels are essential for drying and wiping down the surface of your vehicle during the cleaning and installation process. They provide a clean and residue-free surface for optimal adhesion of the vinyl wrap.
10. Workspace Lighting: Adequate lighting is crucial to ensure you have a clear view of your work area, especially when working on intricate details or during nighttime installations. Set up additional lighting sources to eliminate shadows and improve visibility for precise application.
By having these essential tools and materials on hand, you'll be well-equipped to tackle your DIY car wrapping project on a budget. Remember to prioritize quality materials that offer durability and a good finish, as this will contribute to the longevity and overall appearance of your wrap.
Step-by-Step Guide to DIY Car Wrapping: From Preparation to Finishing Touches
Embarking on a DIY car wrapping project can be an exciting and rewarding endeavor. With careful planning, proper preparation, and attention to detail, you can achieve professional-looking results. Here's a step-by-step guide that will take you through the entire process, from preparation to finishing touches:
Step 1: Gather Your Materials and Tools
Before you begin, ensure you have all the necessary materials and tools on hand. This includes the vinyl wrap, squeegees, cutting tools, heat gun or hair dryer, cleaning supplies, masking tape, primer or adhesion promoter (if required), isopropyl alcohol, lint-free cloths, and workspace lighting.
Step 2: Clean and Prepare the Vehicle
Thoroughly clean your vehicle using car wash soap and water, removing all dirt, dust, wax, and other contaminants. Pay extra attention to areas like the wheel wells, door jambs, and other hidden crevices. After washing, use isopropyl alcohol to wipe down the surface, ensuring it is free from any residue.
Step 3: Measure and Cut the Vinyl Wrap
Measure the areas of your vehicle that you plan to wrap and cut the vinyl wrap accordingly, leaving a few inches of extra material on all sides. Use masking tape to mark reference points and create guidelines, helping you maintain a consistent alignment and positioning of the wrap.
Step 4: Apply Primer or Adhesion Promoter (if required)
If your vinyl wrap or the condition of your vehicle's paint calls for it, apply a primer or adhesion promoter following the manufacturer's instructions. This step enhances the bond between the vinyl and the car's surface, ensuring better adhesion and longevity of the wrap.
Step 5: Start Applying the Vinyl Wrap
Begin by peeling back a small portion of the vinyl's backing and align it with the marked reference points on your vehicle. Use your hands or a squeegee to smooth it out and remove any air bubbles. Gradually peel back the backing while simultaneously using the heat gun or hair dryer to warm the vinyl, making it more pliable and allowing for easier stretching and molding around curves and contours.

Step 6: Stretch and Mold the Vinyl
As you continue applying the vinyl, use the heat gun or hair dryer to warm specific sections before stretching and molding them around curves, edges, and contours of your vehicle. Be patient and take your time to ensure a smooth and wrinkle-free application.
Step 7: Use Squeegees to Smooth and Press the Vinyl
As you progress, use squeegees with a felt or fabric edge to smooth out the vinyl, pressing it firmly against the vehicle's surface. Start from the center and work your way outward, removing any air bubbles or wrinkles. Apply even pressure to ensure proper adhesion.
Step 8: Trim Excess Vinyl and Finish Edges
Once you have applied the vinyl wrap to the desired areas, use a sharp cutting tool to trim the excess material. Make precise cuts along the edges of your vehicle, ensuring clean lines and a neat finish. Take your time to achieve accurate cuts and avoid damaging the paintwork.
Step 9: Apply Heat to Activate Adhesive and Finalize Installation
After trimming and finishing the edges, go over the entire wrap with the heat gun or hair dryer. Apply heat evenly to activate the adhesive, ensuring a secure and long-lasting bond between the vinyl and the car's surface. Use the squeegee to press any remaining air bubbles or wrinkles.
Step 10: Inspect and Fine-Tune
Once the vinyl wrap is fully installed, carefully inspect the entire surface for any imperfections or areas that require adjustments. Smooth out any remaining wrinkles or bubbles using the heat gun, squeegees, or your hands. Pay attention to corners, curves, and intricate details to achieve a seamless and professional finish.
By following this step-by-step guide, you can successfully navigate the DIY car wrapping process, from thorough preparation to the meticulous finishing touches. Remember to take your time, maintain patience, and seek guidance or tutorials if needed. With practice and attention to detail, you can achieve a stunning and personalized result that will transform the appearance of your vehicle.
Comparing the Costs: DIY Car Wrapping vs. Professional Services
When considering car wrapping, one important aspect to evaluate is the cost. It's crucial to compare the expenses associated with DIY car wrapping versus professional services to make an informed decision. Here is a detailed explanation of the costs involved in both options:
DIY Car Wrapping
1. Materials: The primary cost of a DIY car wrapping project is the purchase of the vinyl wrap itself. Prices can vary depending on the quality, brand, and size of the wrap. Typically, a DIY vinyl wrap for a standard-sized car can range from $200 to $800, with premium wraps potentially costing more. Additionally, you may need to invest in other supplies such as cleaning agents, primers, and cutting tools.
2. Tools: To complete a DIY car wrapping project, you'll need specific tools such as squeegees, cutting tools, heat guns or hair dryers, masking tape, and cleaning supplies. These tools can be purchased individually or as part of a car wrapping tool kit. Prices for these tools can vary, but a basic tool set can cost around $50 to $100.
3. Time and Effort: DIY car wrapping requires a significant investment of time and effort. Depending on your skill level and experience, the learning curve may be steep. Proper surface preparation, precise cutting, and meticulous installation can be time-consuming. Consider the value of your time when assessing the overall cost.

Professional Car Wrapping Services
1. Labor and Expertise: Professional car wrapping services employ experienced technicians who have honed their skills through training and practice. They have the expertise to handle various vehicle models and achieve flawless results. The cost of labor for professional services will vary depending on the complexity of the project, but it typically ranges from $1,000 to $5,000 or more.
2. Quality Materials and Tools: Professional car wrapping services often use high-quality vinyl wraps that offer superior durability, finish, and color options. These wraps are more expensive than consumer-grade wraps available for DIY projects. Additionally, professionals have access to specialized tools and equipment, ensuring precise application and a seamless finish.
3. Warranty and Guarantee: Reputable car wrapping professionals often provide warranties or guarantees on their workmanship and the quality of materials used. This offers peace of mind, knowing that if any issues arise with the wrap, the service provider will rectify them at no additional cost.
4. Time Savings: Professional car wrapping services can complete the job much faster than a DIY project. Their experience and efficiency result in a quicker turnaround time, minimizing the inconvenience of being without your vehicle for an extended period.
Comparing the Costs: DIY car wrapping generally offers cost savings compared to professional services. By taking on the project yourself, you can save on labor costs and potentially find more affordable vinyl wrap options. However, it's important to consider the trade-off with your time, effort, and the potential for errors or less polished results.
Professional services, while more expensive, provide the advantage of expertise, high-quality materials, efficient installation, and added guarantees. If you value a flawless and professional-looking finish, are short on time, or lack the necessary skills and confidence for a DIY project, opting for professional car wrapping services might be worth the investment.
Ultimately, the decision between DIY car wrapping and professional services should be based on your budget, available time, skill level, desired outcome, and personal preferences. Assessing the costs and benefits of each option will help you make an informed choice that aligns with your goals and resources.
FAQ for how much does it cost to wrap a car yourself?
Q: Does the cost of DIY car wrapping include tools and materials?
A: The cost of DIY car wrapping typically refers to the price of the vinyl wrap only. Additional tools and materials such as squeegees, cutting tools, heat guns, and cleaning supplies may need to be purchased separately.
Q: Are there different types of vinyl wraps available at different price points?
A: Yes, there are different types of vinyl wraps available at various price points. The cost can vary based on factors such as the brand, quality, color, finish, and design of the vinyl wrap. Higher-end and specialty wraps may be more expensive compared to basic or solid color options.
Q: Are there any other expenses involved in DIY car wrapping?
A: In addition to the vinyl wrap, you may need to budget for other expenses such as cleaning agents, primers, masking tape, isopropyl alcohol, and lint-free cloths. These supplies help with surface preparation and achieving a successful car wrap installation.
Q: How long does a DIY car wrap typically last?
A: The lifespan of a DIY car wrap can vary depending on factors such as the quality of the vinyl wrap, exposure to sunlight and harsh weather conditions, and how well it is maintained. On average, a well-installed and properly cared for car wrap can last between 3 to 7 years.
Q: Are there any risks or challenges with DIY car wrapping?
A: DIY car wrapping can be challenging for beginners and may require practice to achieve satisfactory results. Common challenges include proper surface preparation, precise cutting and trimming, and avoiding air bubbles or wrinkles during installation. Taking the time to learn and practice techniques can help overcome these challenges.
Final Words
In conclusion, car wrapping presents a fantastic opportunity to revamp your ride affordably, giving it a fresh and personalized look that stands out on the road. By opting for a DIY approach, you can not only save money but also unleash your creativity and take pride in transforming your vehicle with your own hands. With a detailed cost breakdown and the right tools and materials, you can embark on this exciting journey confidently.
Remember to prioritize proper preparation, meticulous installation, and regular maintenance to ensure the longevity and stunning appearance of your car wrap. So, get ready to turn heads and make a statement with your revamped ride, all while staying within your budget. Embrace the world of car wrapping and enjoy the transformation that awaits!